Sourdough
May 24, 2022
Sourdough
(My Busy-Mom-Manageable Method)
I've had my sourdough starter since early 2018. It took me several months to find a routine that worked best for me.
There are oodles of different ways to feed your starter and bake with it.
I feed my starter daily - in the late afternoon or early evening. I start with 1/2 cup starter that's leftover from the previous day, and I feed it based on how much starter I need for the next day. Feeding 3/4 cup flour and 3/4 cup water will give you enough starter to use 1 cup the next morning, and have another 1/3-1/2 cup to save back. If you need 2 cups of starter for the next day, then you'd want to double that and feed it 1 1/2 cups each of water and flour, and that will give you the 2 cups of starter you need plus 1/2 cup to save back. Always use wood or plastic or glass for your starter - never metal.
The next morning when I'm doing my baking, I take out the amount of starter I need to use and I put the remaining starter in a quart sized plastic container or glass jar. If I'm not baking that morning, I'll leave the starter alone and in the afternoon before I feed it, I'll take out 1 cup of discard and store it in the fridge.
If you only feed 3/4 cup, you can leave it in the quart sized container. If you feed 1 1/2 cups, you're going to want to move it to a half gallon sized container (I use a glass or plastic pitcher).
My starter's spot is in a corner of my kitchen between my cast iron pans and my butcher block. There's no reason for anyone to reach back in that spot and accidentally spill it, or drop something on it. I know a lot of people don't like plastic, and I don't use a lot of it BUT honestly, it's easier to wash dried starter off of plastic than glass. I'm pretty sure sourdough starter was the original homemade glue ;) It really sticks to things, especially when it's dried on.
Now, how do I use all of this starter? We eat a few loaves of bread a week - we eat it plain with butter and sometimes honey, make toast for breakfast, or french toast, we make sandwiches at dinner time, and sometimes I make bread pudding. I also make noodles at least once a week (which can be frozen) and Saturday supper is homemade pizza. We often use extra discard for making waffles, and we also make biscuits with it. I'll share the recipes and some of the "tools" I use next.
Bread Recipe:
I make 2 loaves at a time, but you can halve the recipe to make one. I have a Bosch mixer, and because of its bigger capacity, it works better for me to knead at least 2 loaves at a time in it. Plus, I have 7 kids that love bread.
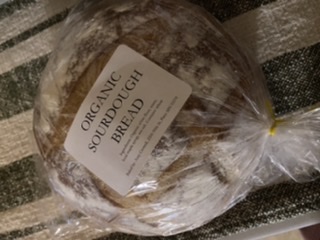
6 cups of organic unbleached unbromated all purpose flour
1 Tablespoon of Himalayan or Redmond salt
2 Tablespoons of pure maple syrup
1 1/3 cups water
2 cups of starter
I knead it together for 15 minutes, and weigh it, and divide into 2 loaves. I use round bannetons, and line them with unbleached parchment paper - a piece big enough that you can pick up the edges to put the loaf in the dutch oven, and take it out when it's done baking. I then put it in a container or tote with a lid, to rise. When it gets about an inch above the banneton, then I bake. I preheat the oven to 450 degrees with my dutch ovens inside it. When it gets to temp, I sprinkle flour on the dough, score it, and gently lift the dough ball out of the banneton (using the parchment paper) and put it in the dutch oven. Bake for 15 minutes with the lid on, remove the lid, and bake another 15 minutes.
For pizza dough, I use the same recipe except I add 2 teaspoons each of granulated garlic, onion powder, and Italian seasoning. I also replace 1/3 cup of water with olive oil (so use 1 cup of water, and 1/3 cup of olive oil). I let it rise in an oiled bowl with a lid. This recipe will make 4 round pizzas or 2 half sheet pan pizzas. I roll out the dough, bake it for 5-7 minutes (5 if thinner round pizzas, 7 if thicker half sheet pan pizzas). Then I take it out and add the sauce and toppings, and bake another 10-15 minutes, until the cheese is melted.
Waffle Recipe:
1 cup of discard
1 egg
2 Tablespoons oil or melted butter
1 Tablespoon pure maple syrup
1/4 teaspoon salt
1/2 teaspoon baking soda
You can also add 1/2 teaspoon cinnamon or 1/2 cup of berries to this recipe. These waffles are seriously the best - you have to try it. They are crispy on the outside and SO light and airy on the inside. You will never, ever go back to frozen waffles after this ;)
Sourdough Noodles:
3 cups of flour
1 teaspoon salt
1 cup of discard
4-6 whole eggs (start with 4)
Put all the ingredients in your mixer, and knead for 5 minutes. If the dough is too dry, add more eggs or a little water. It should be about the consistency of bread dough, but a little wetter. It should come together as one solid mass though. Let it ferment in a greased, covered bowl for as long as you want - the longer, the more sour they will be. I usually do about 8 hours. Then I flour my counter and roll them out and cut with a pizza cutter into the desired shape and size that you like. Most often, I freeze them on parchment paper and then put them in a container after they're frozen, and use as needed for things like soup or stroganoff, or just to boil and then fry for about a minute in melted butter, and sprinkle with some salt. These are really good and really filling also.
Sourdough Biscuits:
1 cup of cold lard or butter
5 cups of flour
1 cup of starter
2 Tablespoons honey or maple syrup
2 cups of water, buttermilk, or kefir
Cut the fat into the flour, and then add the rest of the ingredients. I mix it in my Bosch, with the dough hook. Then I take out the hook and let it ferment right in the bowl, until supper time. Before baking, you add 1 1/2 teaspoons salt, 2 teaspoons baking powder, and 1 teaspoon baking soda to the dough. Mix it just until they're incorporated. Then flour your counter, and roll them out about 1/2" thick. They can be baked in a cast iron pan or whatever you like to use. Bake at 400 for 25-30 minutes.
The "Tools"
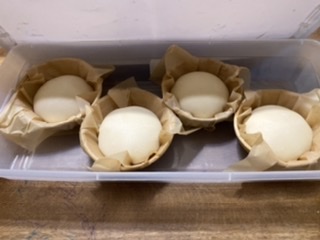
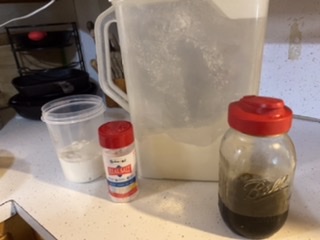
This is the banneton that I use (but I don't ever use the liner). This is the quart container I use for starter, and this is the half gallon pitcher I use. In the summer, I set a small piece of butter muslin over the top to keep out bugs. The rest of the year, I just leave it open to the air and nothing gets in it. This is the kind of container I use to let the bread rise in. I wonder if this size would work? It looks like it might, and it's a 2-pack for $20. If I'm making more than 3 loaves, I let them rise in an under-the-bed storage tote. This is the size of cast iron dutch oven I use. I have a fancy looking enameled one from Magnolia, that's no longer available, and then the plain black like this one. There's really no difference in how they bake. The enameled one now has black stains in the bottom, so if you're concerned about the appearance, I would just stick with the plain black kind. I buy flour from Azure Standard. Recently, they forgot to send my flour and I had to find other organic unbleached flour. I found out the hard way that there are brands that add potassium bromate to their flour, even though it's not on the label. That would be the cheaper brands, like Target's "good and gather." Both King Arthur and Bob's Red Mill do not use potassium bromate. My starter did not like the bromated flour (the dough wouldn't rise and the starter was barely bubbling after being fed). Plus, I think it defeats the purpose of organic if they're going to add another chemical to the flour. I get my unbleached parchment paper at Target. FYI, I'm not an affiliate or whatever it's called - I'm just sharing sources. The best tools are the ones you already have in your kitchen, but I thought I'd use links so you can see exactly what I use and that might help you decide what items from your kitchen will work. I hope all of this helps for those of you who are getting started on making sourdough. I am by no means an expert, just a Mom/farmer/cottage foods baker who wants to feed her family well. Happy baking!